Study Definition module
eForm font and background colour
You can change the background colour of any eForm in a study, and you can set default font and colour details to be used for new eForms. The default settings apply to any item on an eForm that has not had its font details explicitly set.
Note: Fonts will only be available if a default printer has been installed on your machine. If you need to install a default printer, press the Windows Start button on your keyboard, or click the Windows Start icon at the bottom right of your screen. Select Settings and Printers, and follow the on-screen instructions.
To change the eForm background colour
-
Left-click on the eForm whose background colour you wish to change.
-
Select Format > Background Colour.
-
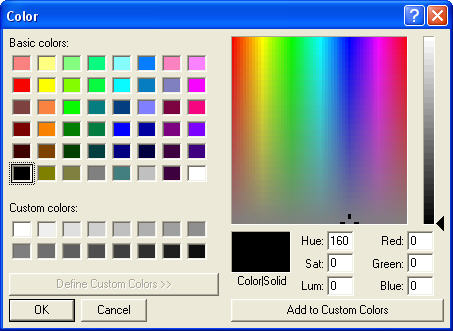
The colour selection window is displayed. See image
-
Select a colour either from the pre-defined colours on the left, or from the colour matrix on the right. Click the  button and click on a field for specific Microsoft help.
-
Click OK to accept the change, or Cancel to abort.
-
The background colour of the selected eForm will change accordingly.
An eForm's background colour can also be changed by right-clicking on the form background, and selecting Change Background colour from the popup menu.
Select Format > Defaults > value.
The default values will be instantly applied to all text and eForms in the current study which have not had their colours or fonts explicitly set. If a new eForm is created, the default values will automatically apply to it. If an eForm is copied from another study, the default values will apply wherever no other explicit values have been specified. They do not need to have been the same default values.
Overriding default values
Click here to see how to override the default font and font colour for any selected piece of text.
The default background colour can be overridden for any selected form by changing the background colour as described above.
Related Topics
Creating a new eForm
Creating questions
Placing questions onto an eForm
Adding space and lines to an eForm
![]() button and click on a field for specific Microsoft help.
button and click on a field for specific Microsoft help.